RV Exercise Bikes: Vibration Control for Mobile Fitness
By Hyejin Park • 2nd May
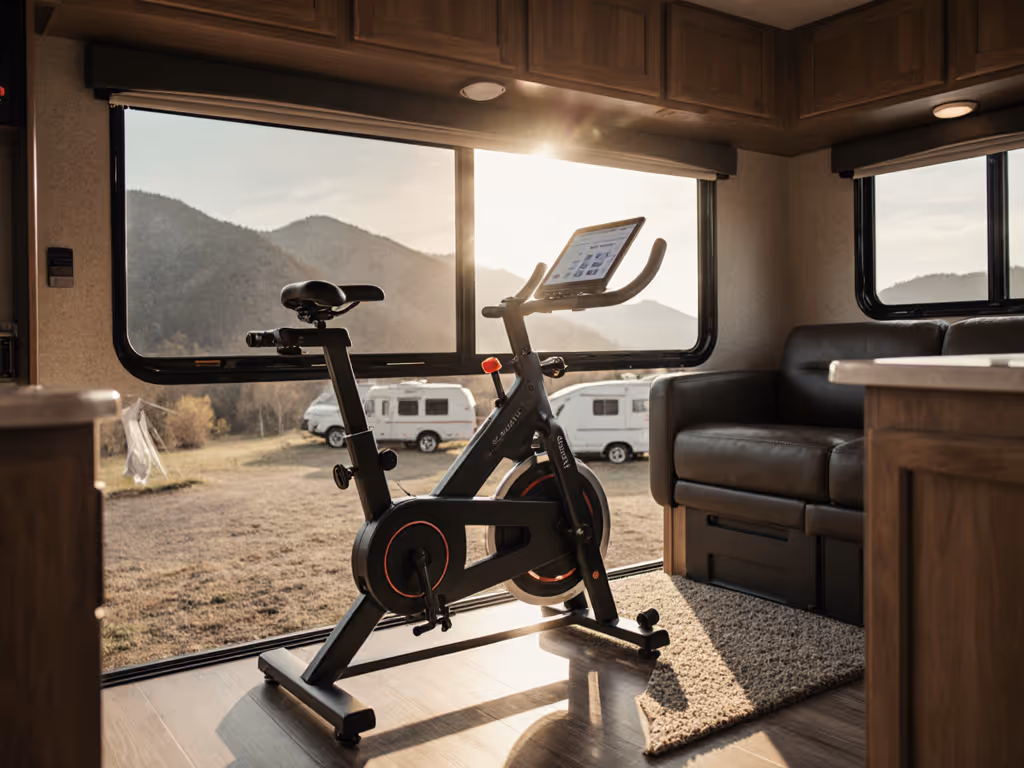
Fitness doesn't stop when you leave home, but in an RV, every pedal stroke echoes through thin walls and shared sleeping quarters. RV exercise bikes and compact camper fitness equipment demand a completely different engineering philosophy than traditional home gyms, one that prioritizes whisper-quiet operation, ultracompact footprints, and rock-solid stability on uneven floors. This FAQ deep dive breaks down how to evaluate vibration control, select the right system, and set it up so everyone in the rig stays asleep. For RV-specific model recommendations and testing on uneven surfaces, see our RV exercise bikes guide.
Why Vibration Matters More in RVs Than Anywhere Else
How Does Vibration Travel in a Mobile Living Space?
An RV's aluminum frame and thin walls act like a resonance chamber. Unlike a house with mass and isolation, every vibration from a flywheel, belt, or pedal directly couples into the frame, waking a sleeping partner in the adjacent bedroom, rattling loose items in cabinets, or amplifying minor mechanical noise into an irritant. Standard home exercise bikes were never designed for this constraint. They assume you can absorb vibration through concrete floors and drywall mass.
The culprit isn't always noise alone; it's harmonic transfer. A bike's flywheel spinning at a certain frequency, combined with pedal cadence and bearing play, creates a cascade of vibrations that multiply as they travel through metal cabinetry and into the chassis itself. This is why a "quiet" bike rated 65 decibels in a showroom might feel deafening in an RV bedroom.
What Actually Causes Vibration in Exercise Bikes?
Vibration originates from three sources:
- Flywheel and bearing runout: Imbalance or worn bearings create wobble, amplified by mass and speed.
- Resistance mechanism contact: Friction pads or brake surfaces slipping against the flywheel generate micro-oscillations.
- Frame and post rigidity: A wobbly seat tube or unstable base resonates rather than dampens vibration.
Magnetic resistance systems eliminate one major source by design. Because magnets on both sides of the flywheel never physically touch it, there's no friction slipping, no brake chatter, and no wear-induced surface irregularities. The magnet position adjusts smoothly, and the energy transfer is purely electromagnetic, fundamentally quieter and more durable than belt or friction alternatives.
But quietness doesn't equal zero vibration. A high-quality magnetic system reduces vibration; a poorly balanced flywheel or a flimsy seat tube still transfers it to the floor.
FAQ: Selecting and Tuning an RV Exercise Bike for Vibration Control
What's the Practical Decibel Target for RV Use?
Marketing claims often cite 60-65 decibels for "quiet" bikes, roughly the sound of normal conversation. In an RV, this is misleading because structure-borne vibration isn't always audible as decibels; it's a thrumming sensation transmitted through the frame.
A practical target is 55-60 decibels of airborne noise plus measurable vibration isolation. Look for bikes that:
- Use magnetic resistance (proven quieter mechanism).
- Feature a rigid, well-braced frame with minimal flex.
- Include isolation feet or a damping mat to decouple the bike from the RV floor.
- Have a dynamically balanced flywheel (usually stated in product specs or verified by independent reviewers).
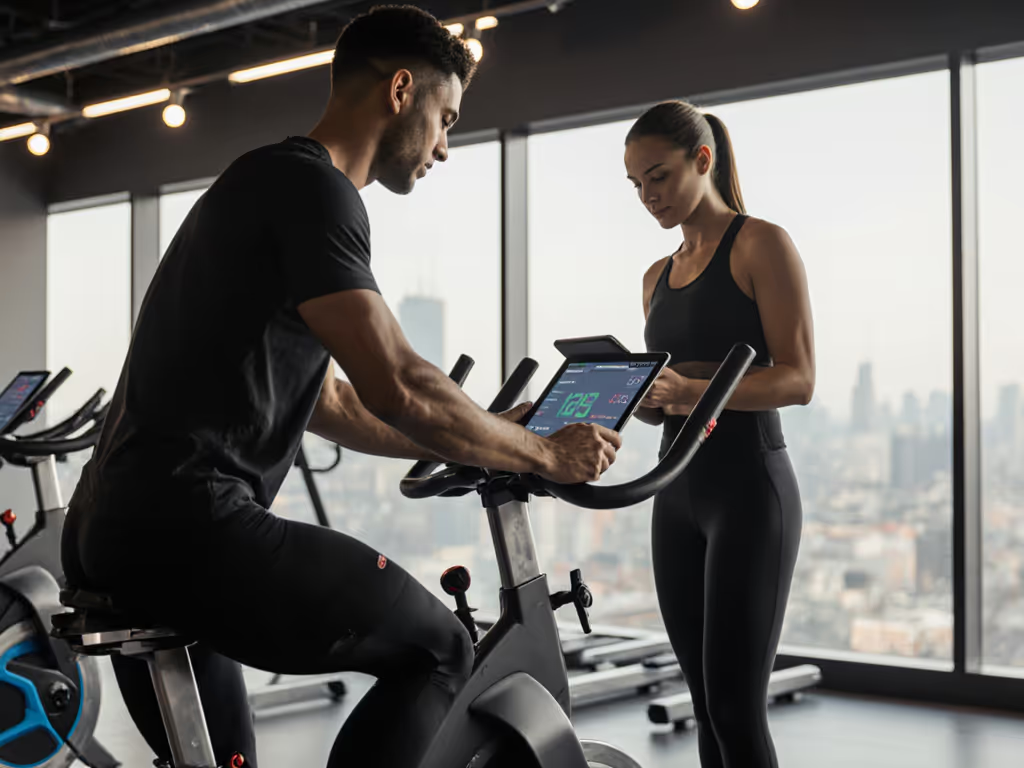
In my own field testing, I once hosted a family of five on a single bike, riders ranging from 4'11" to 6'3", and we timed setup swaps, logged knee angles, and marked posts with tape in our test RV. What surprised me most wasn't power accuracy; it was how much comfort and stability reduced the sense of vibration. Loose seat posts, poor pedal clearance, and bad bar reach all force riders into compensation movements that create micro-impacts. Comfort and adjustability are performance multipliers at home, and they're vibration suppressors in an RV.
How Do I Know If an RV Exercise Bike Will Fit My Space?
Fit first, everything else follows. Measure your RV bedroom or lounge in three directions:
- Length: From the wall you'll push the bike against, measure to any obstruction (bed frame, closet door). Most portable exercise for RV setups require 52-65 inches front-to-back (compact folding models: 40-50 inches).
- Width: Measure the clear floor space, edge-to-edge. Upright bikes typically need 24-28 inches; recumbent bikes need 30-36 inches.
- Height: Measure from floor to the lowest ceiling fixture, ductwork, or bunk. Most upright bikes are 42-48 inches tall; recumbent bikes are 38-44 inches.
Then confirm that your frame clears door frames and that you can roll it through an RV hallway (typically 24 inches wide). For space-constrained rigs, compare footprints and folding designs in our small space exercise bikes roundup. Look for bikes with integrated transport wheels rated for RV flooring: wood, linoleum, and composite surfaces all have different friction profiles.
Multi-user households need to verify adjustability too. A space-saving bike for campers that only adjusts seat height won't work for a household with significantly different proportions. Confirm range: seat fore-aft travel, handlebar height and reach, pedal crank length (common range: 165-175 mm), and Q-factor (the distance between pedals).
What Role Does 12V Power Play in RV Fitness Equipment?
12V power fitness equipment is advertised as a major convenience, but it's less critical than marketing suggests. Most RVs have both a 12V DC auxiliary battery (for lights, water pumps, slides) and 120V AC shore power or inverter supply. An exercise bike's resistance adjustment typically draws 2-5 watts for motor/solenoid control; the real power drain is optional components: console displays, Bluetooth modules, or cooling fans.
When evaluating 12V options:
- Verify inverter capacity: A 1500-watt inverter can safely run a 300-watt power draw (including the bike and console). Check your RV's inverter spec.
- Confirm backup power: If the RV battery is low, a 12V system may malfunction mid-ride. Battery-independent mechanical resistance (pure magnetic or friction, no electronics) is more reliable.
- Weigh the benefit: 12V DC does reduce heat dissipation compared to AC systems, but the practical gain is negligible in most use cases.
For most mobile fitness setups, a standard 120V AC-powered bike is simpler and more compatible with apps and smart trainers than a proprietary 12V system.
How Do I Isolate Vibration After the Bike Is Set Up?
Even a well-engineered bike benefits from secondary vibration isolation:
- Use a damping mat (rubber or neoprene, 1/2-3/4 inch thick, placed under all four feet). Mats rated for 300+ pounds and with closed-cell construction reduce floor transfer.
- Stabilize the floor: Place the mat on a hard, level surface. If your RV has a slight slope or soft flooring, shim the mat with hard plastic wedges until the bike is level. A bike that rocks transfers vibration as vertical shock.
- Secure the seat post and console: Vibration often travels through loose hardware. Use a torque wrench to confirm seat post clamps are tight (typically 8-12 N·m). Check bar mounts and console brackets weekly.
- Schedule bearing maintenance: If the bike has exposed bearings (unlikely in sealed magnetic systems), inspect every 6 months and lubricate per manual specs. Use our exercise bike maintenance guide for step-by-step lubrication and troubleshooting checklists.
Can I Use Any App With a Compact RV Bike, or Is There Vendor Lock-In?
This is where vibration control for mobile units meets a larger reliability question. A bike that only works with one proprietary app is a liability in an RV because:
- Firmware updates may fail without cloud connectivity (RVs often have intermittent internet).
- If the company goes out of business, the bike becomes a resistance-only machine.
- Multi-user households can't sync workouts to different health platforms.
Look for bikes that broadcast Bluetooth FTMS (Fitness Machine User Data Service) and ANT+ FE-C protocols. For deeper guidance on open protocols and app ecosystems, see which bikes support all fitness APIs. These are open standards supported by Zwift, TrainerRoad, Rouvy, Apple Fitness+, and dozens of smaller platforms. If you have a choice between a magnetic bike that syncs to Bluetooth and one that requires a proprietary console, the open-protocol option is more future-proof.
Verify app compatibility before purchase by checking the manufacturer's spec sheet or reaching out to support. Don't assume "Bluetooth capable" means universal app support, since some bikes only broadcast to their own app.
Selection Checklist: Finding Your Ideal RV Exercise Bike
Use this checklist to evaluate any bike you're considering:
- Vibration: Magnetic resistance or sealed friction mechanism? Flywheel weight stated? Independent vibration or decibel rating available?
- Space: Footprint (L×W×H) verified in your RV layout? Transport wheels rated for your floor type? Can you fit it through doors and hallways?
- Fit Range: Seat height range, fore-aft travel, handlebar adjustment, pedal clearance. Does it fit from 5'0" to 6'3"? Quick multi-user presets available?
- Connectivity: Bluetooth FTMS and ANT+ FE-C support? Works with Zwift, Apple Fitness+, TrainerRoad, or your preferred platform?
- Power & Accuracy: Stated power accuracy (±2% or better)? Calibration simple and accessible? Any drift reports in user reviews?
- Durability: Sealed bearings? Corrosion-resistant paint or powder coat for sweat environments? Warranty length and coverage?
- Parts: Standard 9/16" pedals, replaceable saddle, seat post diameter matches common specs? Parts availability and lead times documented?
- Support: Responsive customer service? Assembly and setup instructions clear? Troubleshooting guide available?
- Cost: Total cost of ownership including mat, Bluetooth monitor (if needed), optional HR strap, and annual maintenance estimates?
Actionable Next Step: Your RV Bike Setup Protocol
-
Measure your space (use the three-dimensional checklist above) and confirm the bike's dimensions fit your RV layout with at least 6 inches of clearance on all sides.
-
Define your fit requirements. If multiple people will use the bike, measure each rider's inseam and reach, then verify the bike's adjustment range covers all of you. Create a quick-reference card with seat height, fore-aft position, and handlebar settings for each user, especially if you have young riders or very tall guests. Write these down; trust memory and you'll waste setup time every session.
-
Test the bike for vibration in a real-world setting before committing. If the seller allows a home trial or if your local bike shop has a demo, spend 20 minutes at different cadences (60, 80, 100 rpm) and listen for thrumming or buzzing. Have someone in the adjacent room report what they hear.
-
Plan vibration isolation. Allocate budget for a 1/2-3/4 inch damping mat ($30-$80), and confirm your RV floor is level. If the floor slopes, you'll feel instability no matter how quiet the bike is.
-
Verify app compatibility by logging into your preferred training platform (Zwift, TrainerRoad, Apple Fitness+, etc.) and checking that the bike model appears in the supported-device list. Don't rely on "Bluetooth" alone; test the pairing before purchase if possible.
-
Once installed, log your initial fit settings and maintenance baseline (pedal clearance, bearing noise, console responsiveness). Check tightness of all hardware monthly. Schedule a noise/vibration audit every 3 months; note any new squeaks or changes in feel, and address them before they compound.
Comfort and adjustability aren't luxuries in an RV; they're the foundation of a sustainable routine. A bike that fits perfectly, sits quietly, and connects to your favorite app is one you'll actually use on early mornings, during layovers, and through long seasons of mobile living. Measure twice, choose once, and trust the setup process to transform a compact camper bedroom into a genuine fitness space.
Related Articles